
Github Pages is a free static web hosting service from Github. It can be used for personal blogs, project introductions/documentation, organizational websites (like laboratory websites), etc. This article will detail how to use Github Pages (the steps are actually very simple, and you can set up a website in as little as 10 minutes). Before starting, here’s a brief introduction, or you can jump directly to the specific steps for creating a project homepage and a personal blog.
Introduction to Pages#
The advantage of Pages is that it does not require setting up a server, database, or other environments, making it simple, stable, and free. This makes Pages very suitable for personal blogs, project homepages, and corporate websites, which are purely for display (and may not generate revenue 😂). Its disadvantage is that it can only host static web pages, meaning that the content displayed on the website is the same for every visitor. This does not mean that there cannot be any dynamic elements in Pages; for example, you can implement blog comments using Issues or Discussions. However, for more complex websites (like those requiring login) or those with complex data processing, having a server backend would be more convenient.
After each update to the project, Pages does two things:
- Converts the Markdown in the project into a website using Jekyll
- Hosts this website
Since Jekyll only processes Markdown files based on some configuration files, all web pages will be preserved as they are, so you can also directly push the built website to the project, just to take advantage of the hosting. This approach can be done using any method, such as hexo and hugo, and the process is the same as building locally with Jekyll and then uploading the website.
In summary, there are three main ways to use Pages:
- Upload Markdown and let Pages use Jekyll to build and host the website directly.
- Upload Markdown and use Github Action to build and host the website.
- Directly upload web pages and let Pages host them.
The complexity and flexibility of these three methods increase sequentially.
- The first method is the simplest and most convenient, but Pages' Jekyll only provides 13 single-page themes designed for project homepages, so usually, only project homepages use the first method.
- Most personal blogs and organizational websites use the second method, which is flexible enough and does not require local environment setup; the Action build scripts are usually included with Jekyll themes, so you don’t need to worry about writing them yourself.
- Directly uploading web pages offers the highest flexibility, but in most scenarios, it seems unnecessary. Unless you are not using a tool like Jekyll to generate web pages and are writing the web pages directly, the second method should be sufficient.
Github#
This section is aimed at readers who have never used Github or git version control tools before, providing a brief explanation of how to register for Github, create a project, and what git is.
Github is a code hosting platform where developers upload code to facilitate synchronization among multiple developers on a project, and it also helps in the dissemination of open-source projects. Registration requires an email; visit the Github registration page and follow the prompts.

Projects on Github can be created by yourself or copied from others; for blogs, it is common to directly copy theme projects. Forking means making a copy of someone else's project and saving it under your own Github account. There is a Fork button in the upper right corner of each project.

After clicking, you will be redirected to your new project, which has the same content and name as the original project. This project is now under your account and can be modified.
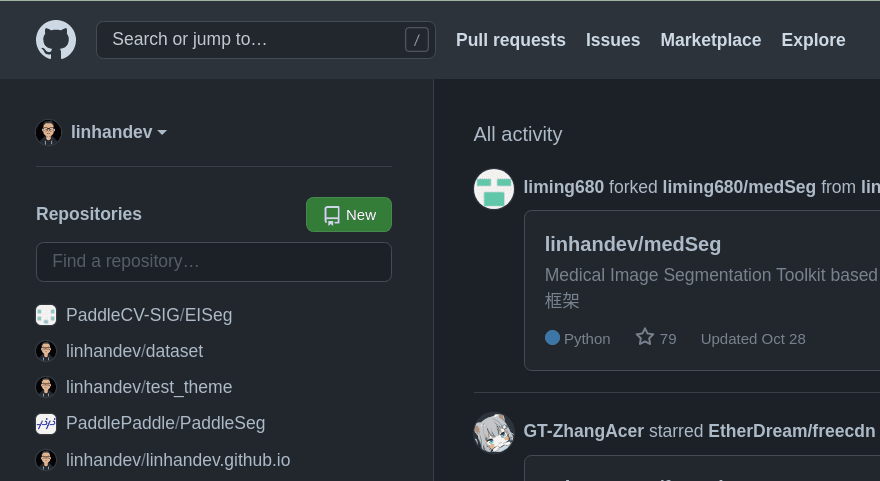
If you want to create your own project, just click the green Create new project button on the left side of the homepage.
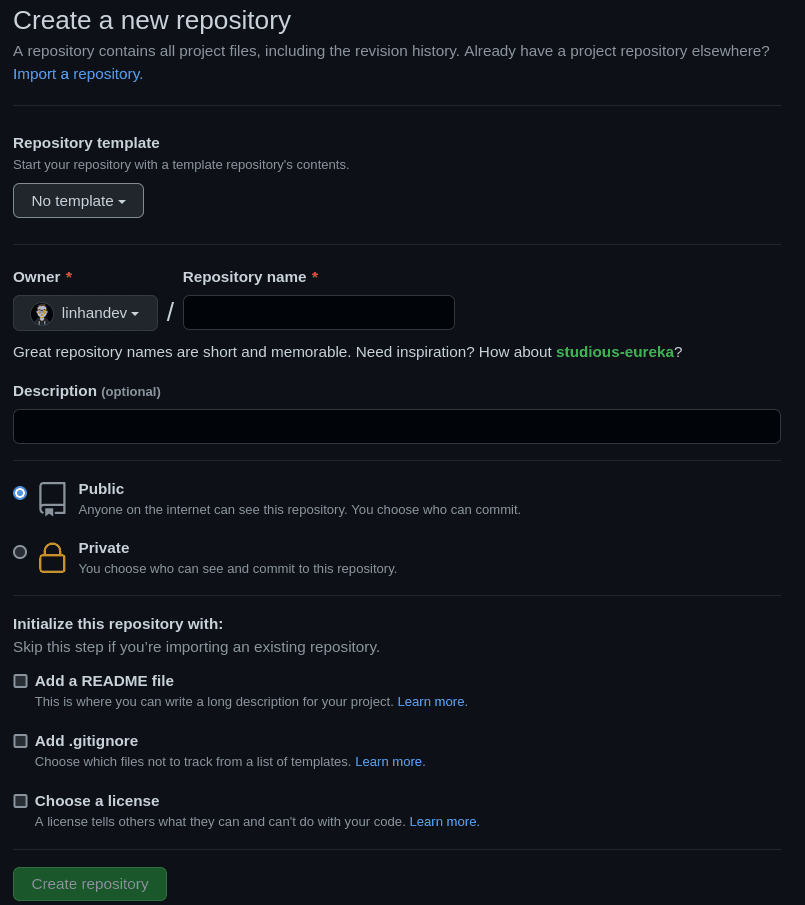
It is generally recommended to add a README.md; an empty project cannot be pulled down directly from Github and requires a few local operations, which is a bit cumbersome.
Git is a code version control tool that allows you to create some archive points during the coding process. If there is only one developer, these archive points will likely form a straight line, each newer than the last, like the red line in the image below. If multiple developers modify the project simultaneously, the archive points can have some parallel paths, like the blue and yellow lines in the image below. For personal blogs, you don’t need to know much about git; operations do not require the command line, as there are many GUI git software options like Github Desktop and gitg. The simplest way to create a blog is to fork a theme project, pull the project to your local machine, make modifications, and then push the changes back to Github. The specific operations will be explained later.

Project Homepage#
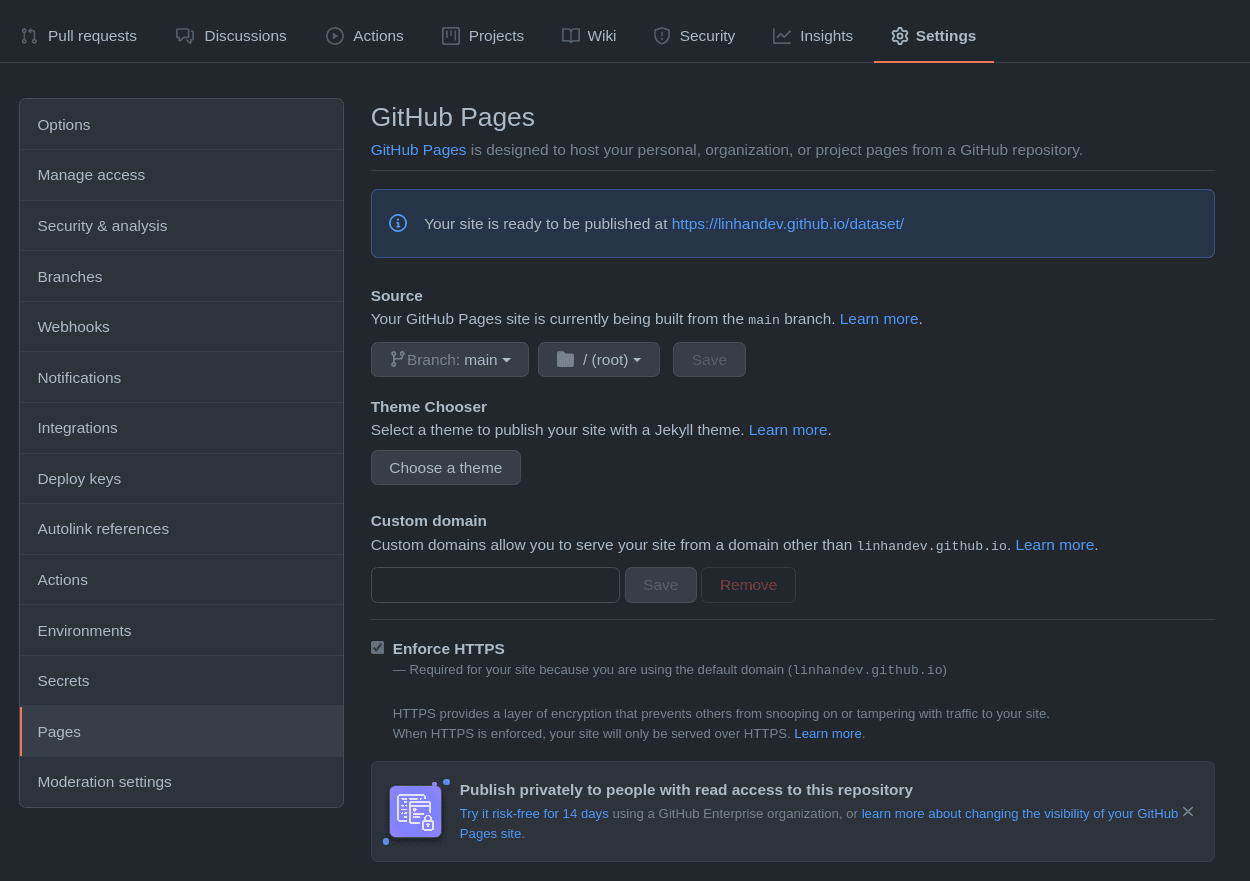
Starting with the simplest, let’s introduce how to create a project homepage, which is how to use Pages to directly turn Markdown into an accessible website. First, open a Github project and go to Settings -> Pages. A project that has not enabled Pages should look like this:
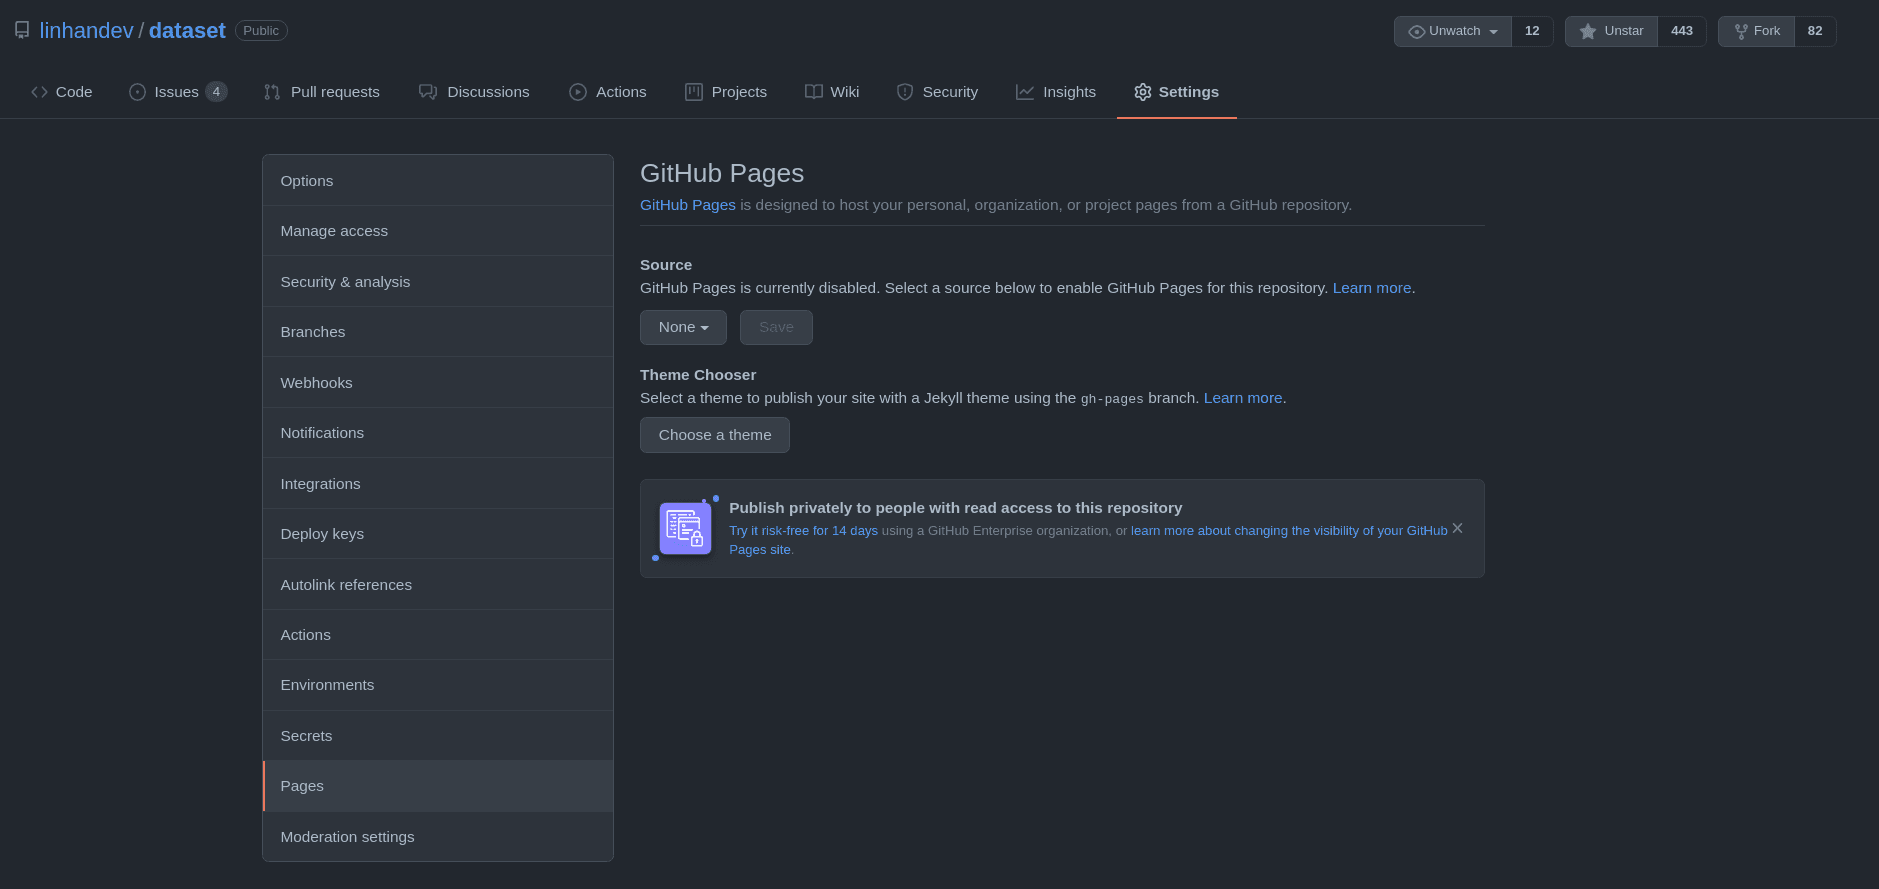
Select the branch where the Markdown is located in the Source.

The folder option specifies where to find the Markdown files in this branch. If there is only a README.md in the root directory, keep the default /(root); if the documents are divided into multiple files, you can place them in the docs folder and select /docs.

Save.

After a while, you can visit the above URL to see the webpage. Pages uses an environment for static site generation and hosting; to check the progress, first return to the project homepage.
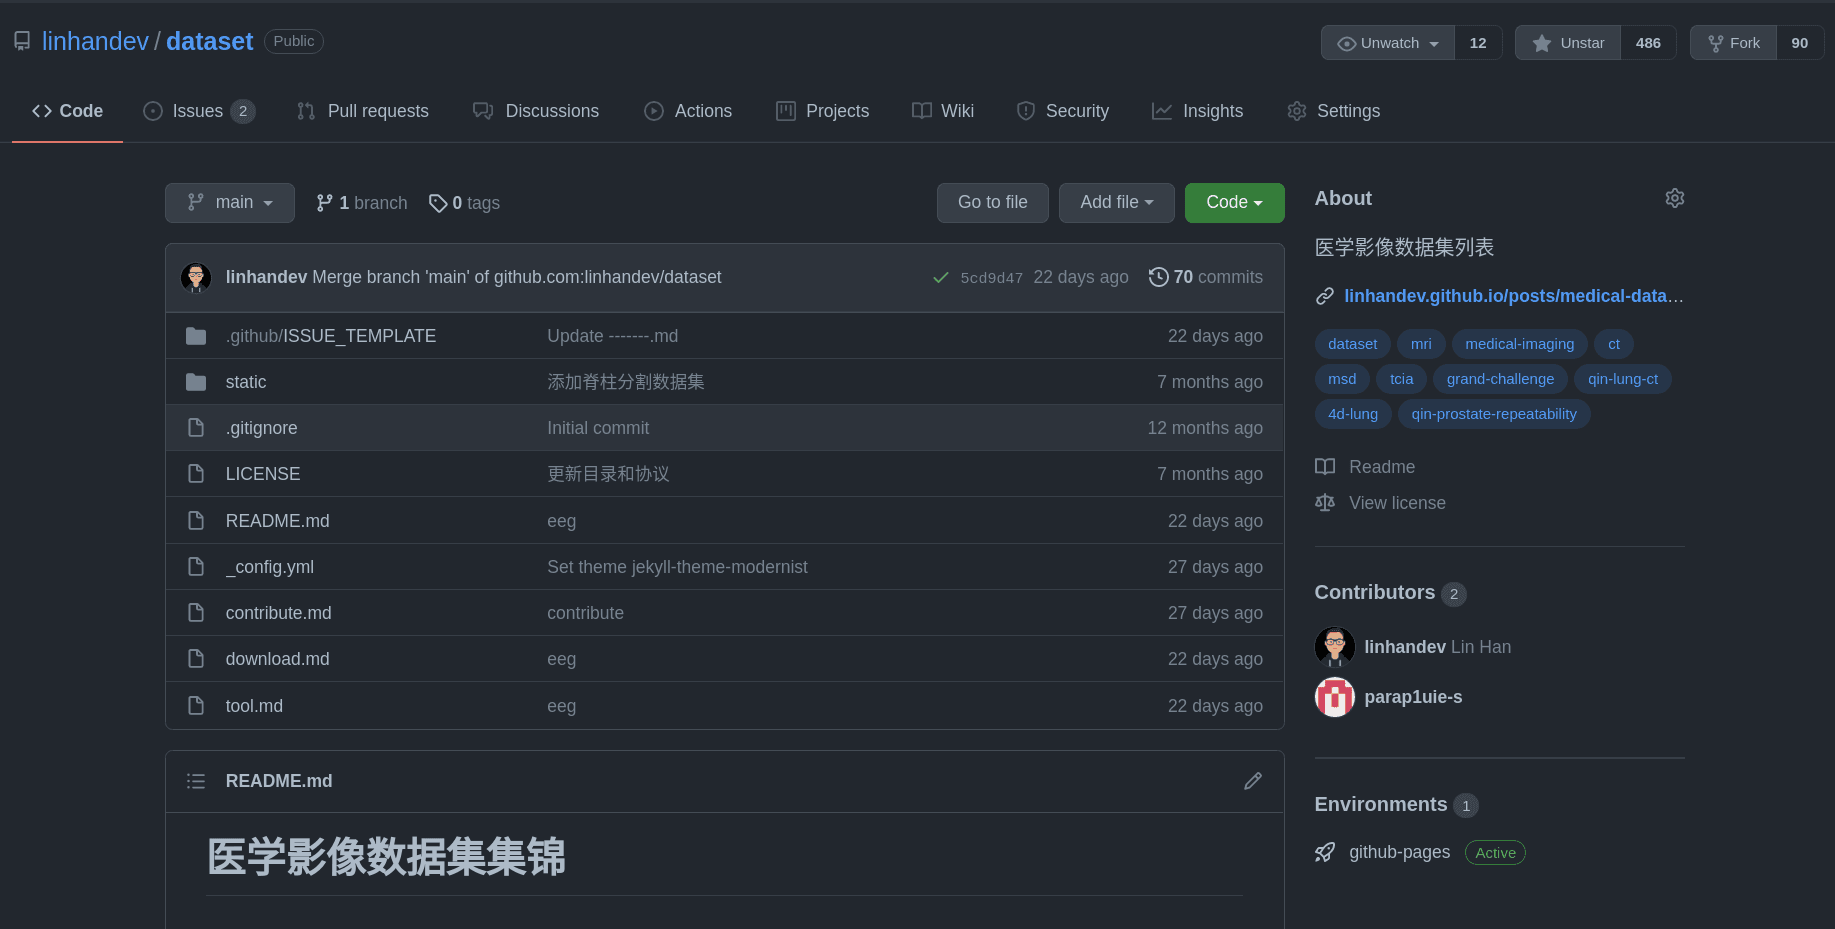
In the lower right corner, you can see an Environments section; click on the github-pages.
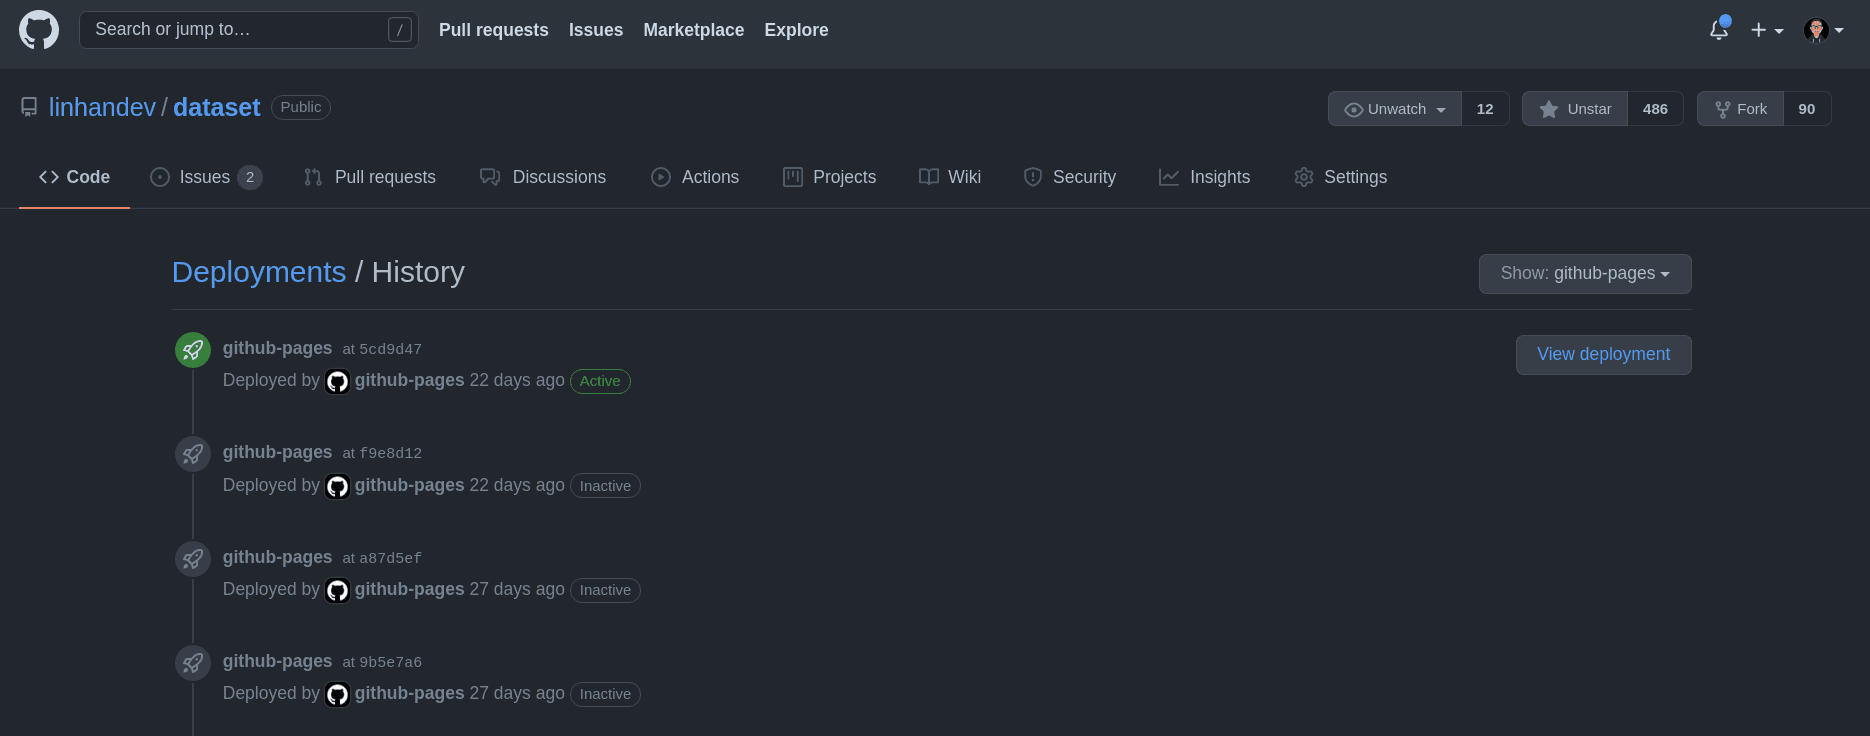
You can see the deployment execution status; refresh a few times to see a new deployment record, and clicking view deployment will redirect you to the webpage.
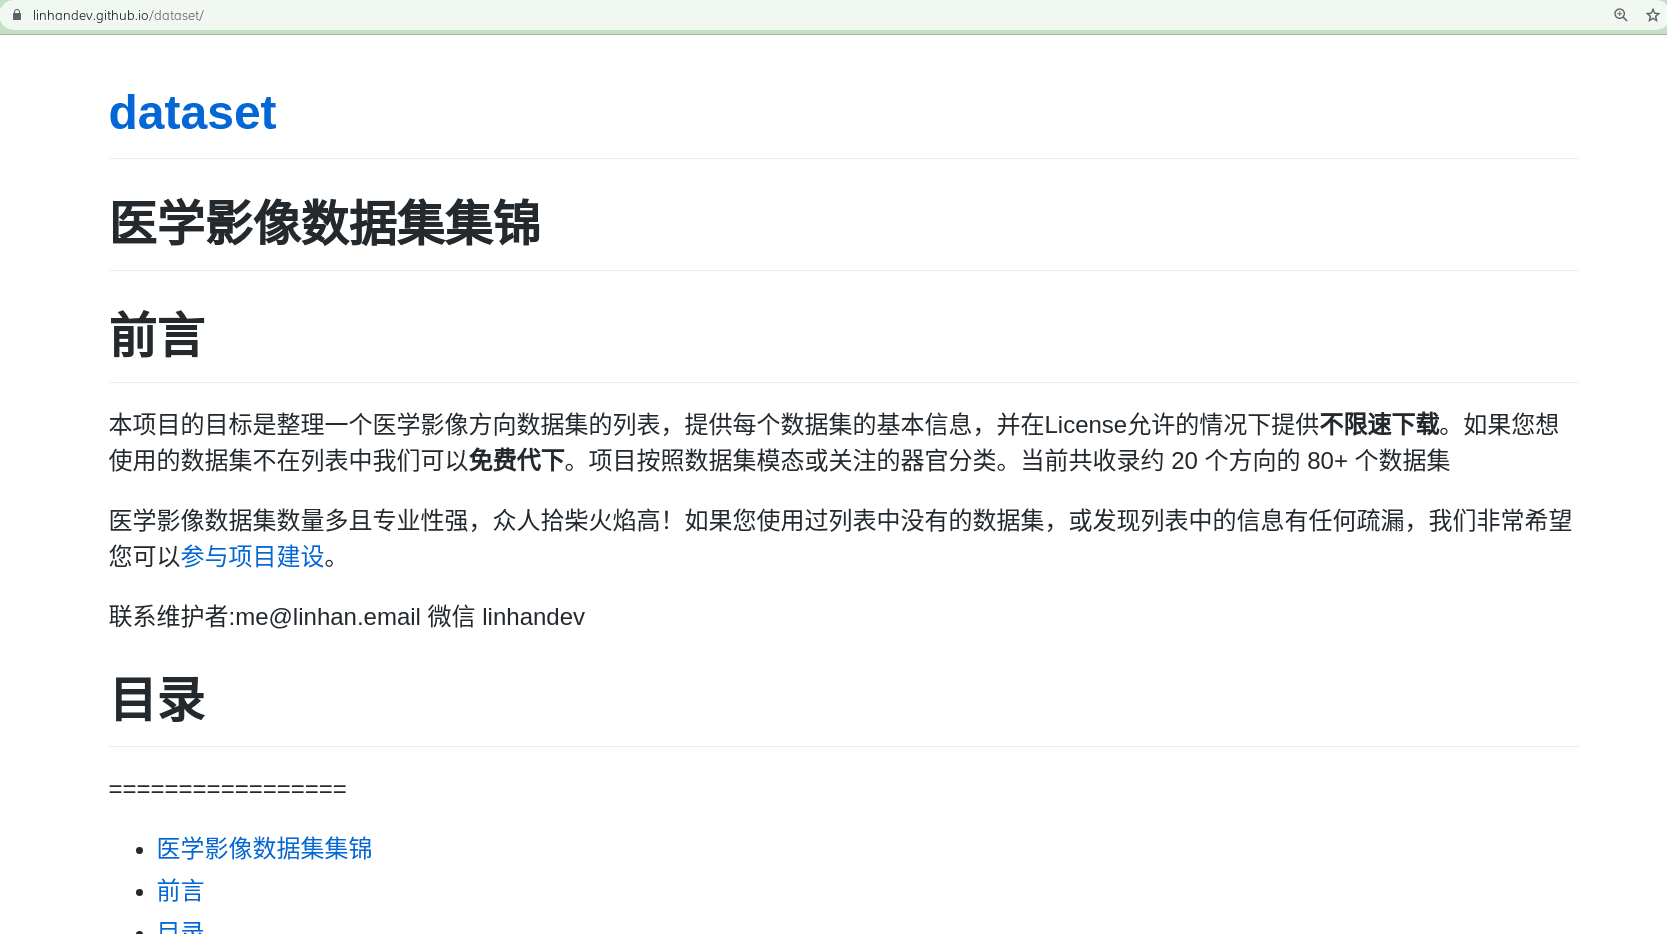
The default deployment without a theme may look quite plain; you can select a theme in Settings -> Pages -> Theme Chooser -> Choose a theme.
After clicking, you will see a preview of the theme; click Select Theme to choose a theme.

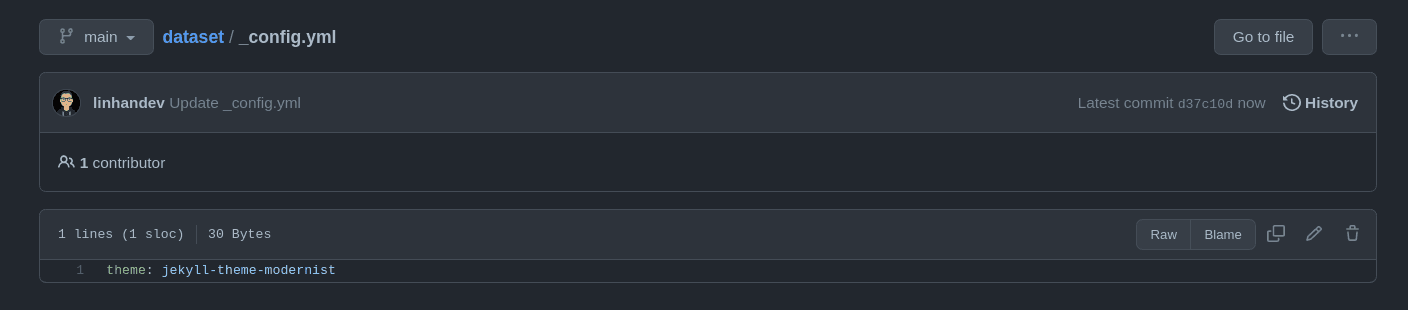
At this point, Pages will create a _config.yml file in the code, recording the theme you selected. The content will look something like this:
After a while, once Pages updates, you will see the themed webpage.
Pages provides 13 themes, and it is not recommended to use any themes outside of these 13 for project homepages. The documentation for Pages describes how to use external themes, but the Jekyll environment for Pages is relatively simple, and many themes may lack gem dependencies. Moreover, the deployment process seems to lack detailed logs; when issues arise, it often only states that the build failed, making it difficult to debug.

If you want to use third-party themes, it is recommended to create an environment using Action for compilation.
Personal Blog#
Now we come to the main focus of this article, deploying a personal blog using Pages. The process is very simple: choose a theme, use Jekyll or similar tools (like hexo or Octpress) to build Markdown into HTML, and then push it to the Github project to complete the setup (I have only used Jekyll, so the following will also be based on Jekyll, but the process is the same with other tools). This building step is usually done using Github Action, which is very convenient, and the setup process can be completed in 10 minutes. Local building is a bit more troublesome but offers higher flexibility, which will be explained separately below.
Theme#
If you are a front-end expert, you can create a theme using HTML, CSS, JS, and Liquid languages, but Jekyll has a rich ecosystem of themes that can be forked and used immediately. The guiding principles for choosing a theme are aesthetics and usability. Aesthetics are purely subjective, so there’s not much to say. Usability means hoping that the theme has as many features as possible. Some common features include:
- Blog search
- Automatic sitemap generation: facilitates search engine indexing, as search engines are likely to be the main source of traffic for blogs
- Article tags and categories: the blog homepage generally displays articles in order of publication, and tags and categories become useful as content increases
- Article table of contents (TOC): useful for long articles
- Publication time and modification time: publication time is usually available, while modification time needs to be checked in git records, and not all themes have this
- Dark mode
- Code blocks
- Mathematical formulas
- ...
Even if these features are not included in the theme, you can add them yourself, but having them included can save a lot of trouble. Themes are generally Github projects, and those of high quality usually have many stars and forks and are updated frequently. Good themes generally have detailed tutorials and are less likely to encounter issues during deployment.
This article uses the Chirpy theme that I am currently using as an example; you can explore more themes on the following websites:
It is recommended to fork the theme; the advantage is that it is convenient to follow upstream updates using Github's recent Fetch Upstream feature.

After forking the project, you need to rename the project to the format username.github.io; for example, if my Github username is linhandev, then the project name would be linhandev.github.io. The first setting in Settings is this.

If there is a name conflict, remember to save the content if you need to delete the previous blog; I have lost several completed articles before... Projects occupying the name do not need to be deleted; just rename them.
Take a look at the theme's README for instructions on usage; it usually details what operations need to be performed after forking. For example, Chirpy requires running a script. Although reading documentation can be tedious, it definitely saves time compared to debugging after encountering issues. Plan carefully; I feel I have a lot to improve in this area based on recent interviews.
Most of Jekyll's main settings are in the _config.yml file in the root directory, such as website title, subtitle, timezone, avatar, and some social media configurations. Go through this file; there are usually comments explaining each setting, and make the necessary changes.
Action Build#
Writing Actions is slightly complex, but most themes either come with scripts for building with Action or can be built directly using Pages' environment. The purpose of writing this part is mainly to facilitate debugging when blog builds fail; I may update this Action with specific writing instructions later. If the theme does not provide this script and you are not familiar with Actions, local building would be simpler.
Github Actions are triggered after certain actions occur in the project, such as push or opening an Issue. The Action configuration is in the .github/workflows folder of the project. First, check the relevant sections in the theme's README.md about getting started; some themes may have an initialization script. When I used Chirpy, I took a lot of unnecessary detours because I didn’t read the documentation carefully.
After each push update, the Action will execute automatically; on the project code page, there will be an icon to the left of the commit, as shown in the red box below.

During the Action execution, there will be a yellow dot, and a green checkmark indicates successful execution; if you see a red cross, it means there was an issue. After successful execution, check the dropdown menu in the upper left corner of the code page to see if a new branch has appeared.

Modify the settings in Settings -> Pages to change the Source to this branch.
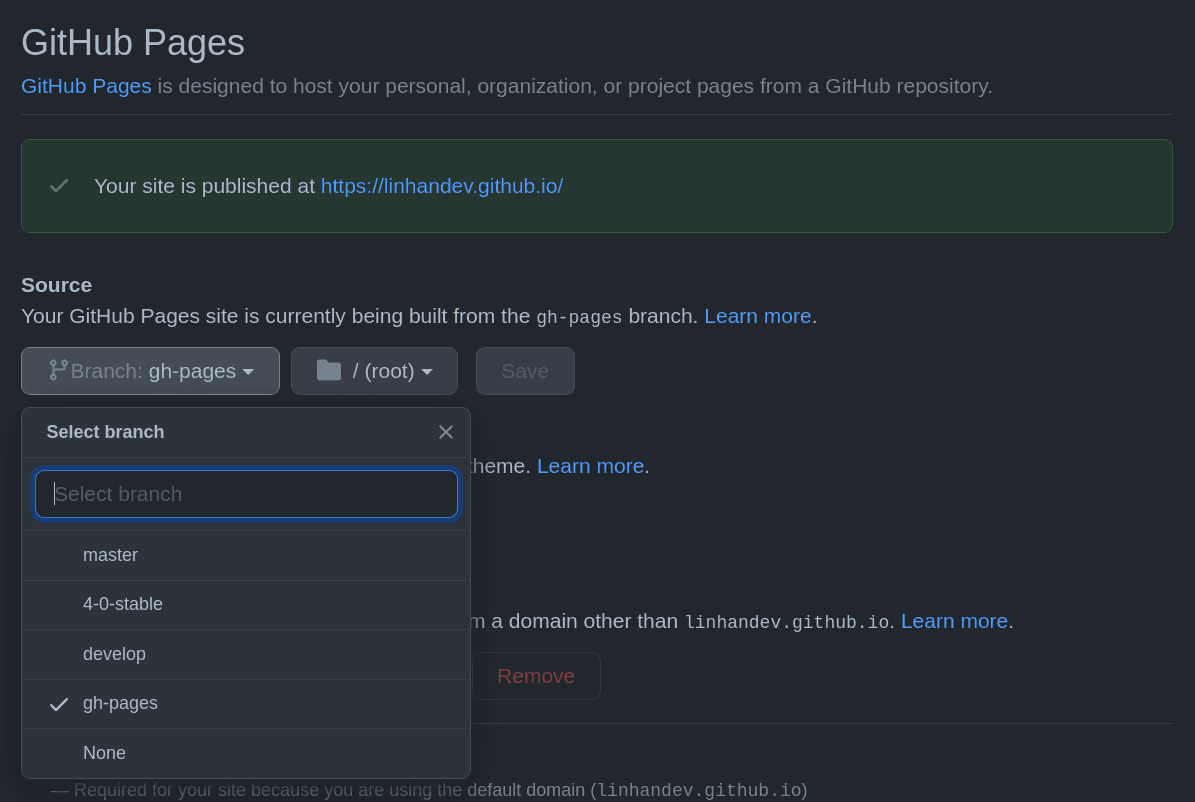
If the left side of the commit graph shows a red cross, you can check the Action execution log to troubleshoot the specific issue.
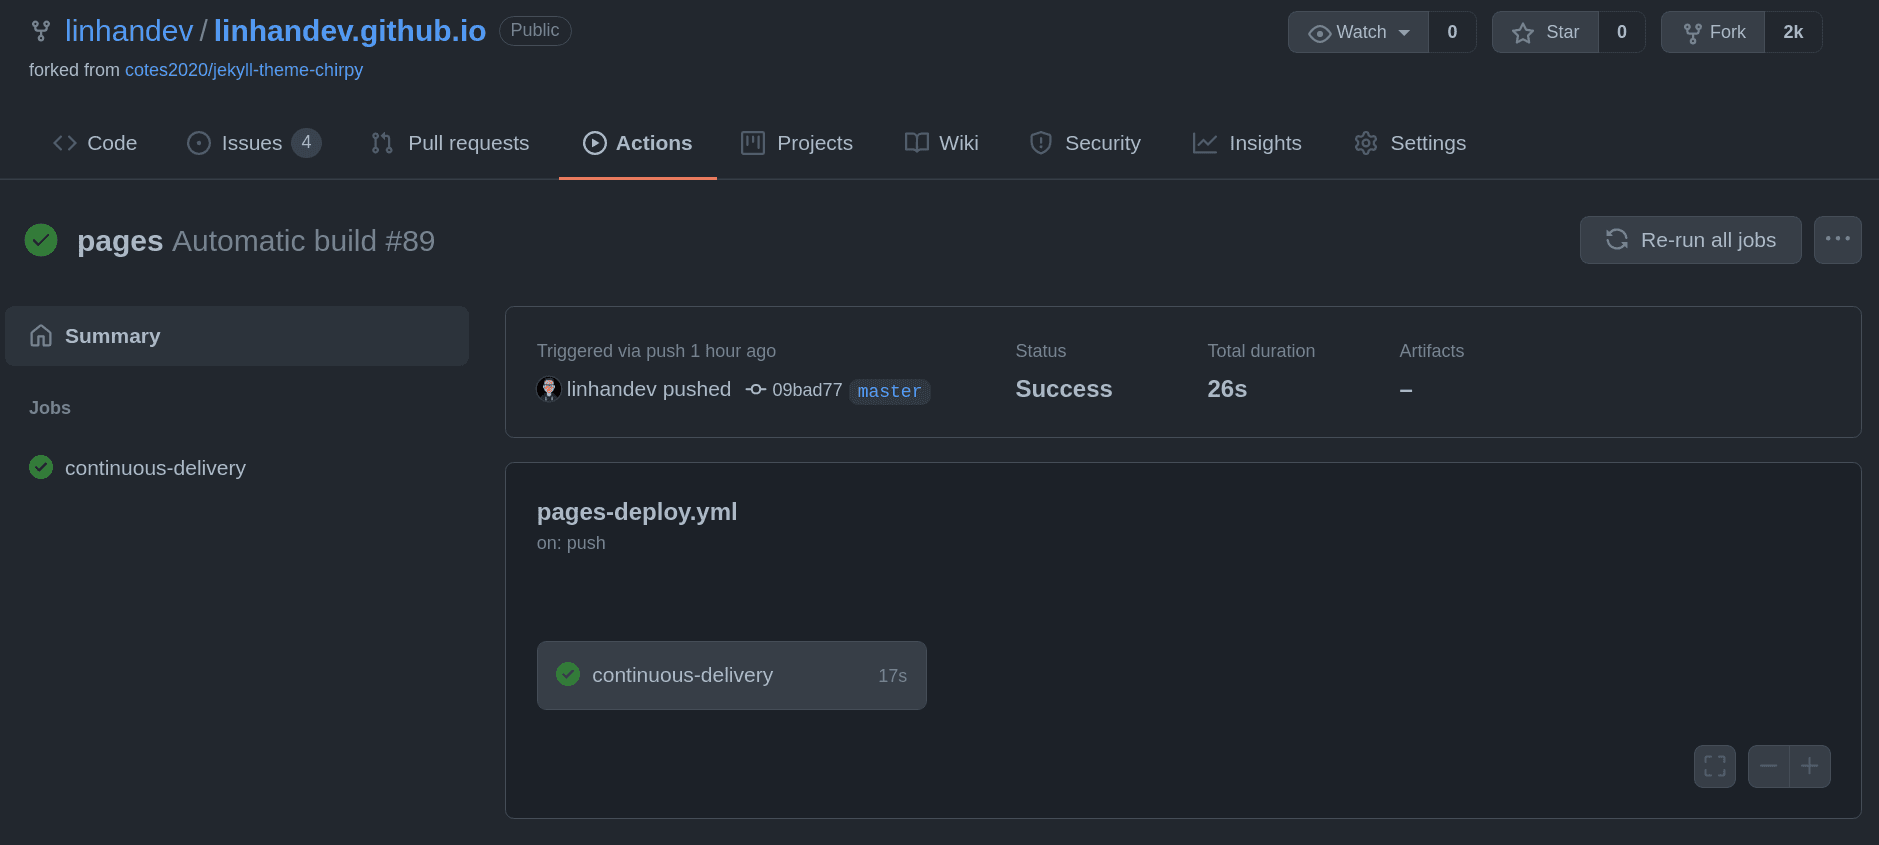
- Click on Actions at the top of the project to see all executions.

- Clicking into one of the executions will show this.
- Clicking the button at the continuous delivery position (it may not be named exactly this) will show the specific execution log.
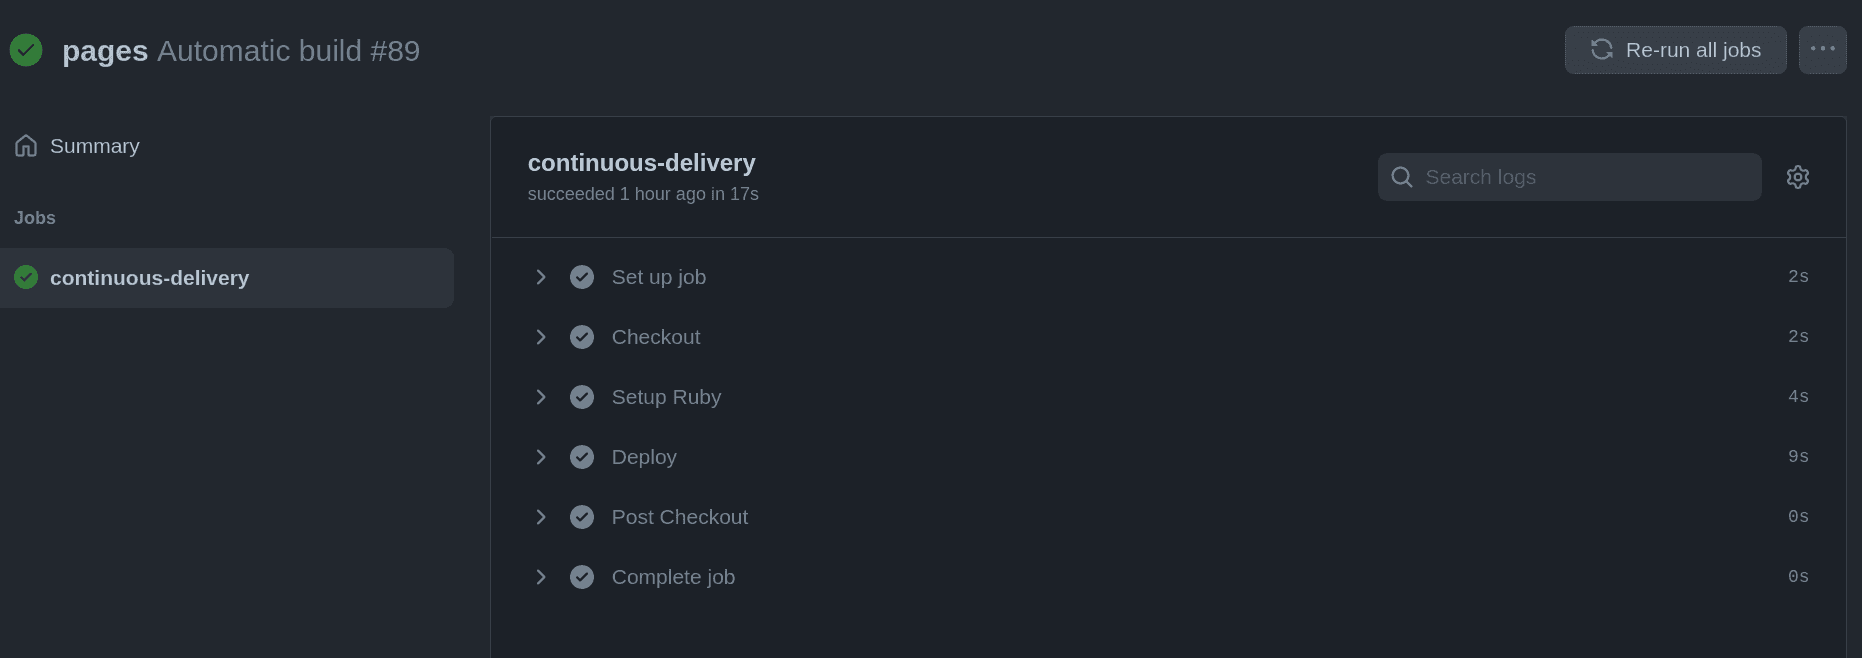
Expanding the error section will reveal the specific issue.
The first execution of the Action requires creating an environment, and the subsequent dependencies may take longer, possibly a few minutes. Chirpy's Action script caches the Ruby environment, so subsequent executions only take about half a minute. After the Action executes successfully, Pages will also need a few minutes to update; as long as the Action executes successfully, this release should be fine, and you can just wait.
Local Build#
Using Action for building is very convenient, but the main drawback is that you need to wait a few minutes after each push to see the results. Generally, this is not a problem, but if you encounter issues and need to compile repeatedly for debugging, it can be quite a wait. Running Jekyll locally allows for real-time compilation; after saving, refreshing the webpage will show the updates.
Environment Installation#
Jekyll is written in Ruby, and running it locally requires installing Ruby and the Ruby package manager RubyGem. Here are the installation steps for Arch Linux; other systems can refer to the official installation documentation.
sudo pacman -S Ruby base-devel
During the installation, I encountered a small issue where several files from the Tsinghua source failed to download. The solution was to go to the Tsinghua source website, download the corresponding installation package files directly, and then install them using pacman -U. After installing Ruby, change the source, and then install jekyll and bundle.
# Add Tsinghua source and remove the default source
gem sources --add https://mirrors.tuna.tsinghua.edu.cn/Rubygems/ --remove https://Rubygems.org/
gem sources -l # List all sources; there should only be TUNA
gem install jekyll bundler # Install packages
bundle # Let bundle install jekyll's dependencies
jekyll # Test if the installation is correct
# The first two lines of output should be
# A subcommand is required.
# jekyll 4.2.1 -- Jekyll is a blog-aware, static site generator in Ruby
If the last line above outputs that the jekyll command cannot be found, it may be because the executable file path does not include the bin folder from gem. Carefully check the output of the gem install command, which should provide hints regarding this issue, and add the bin path to PATH.
gem environment # Check the GEM PATHS section in the output
export PATH=$PATH:[the gem path above] # For example, on Arch it is /usr/lib/Ruby/gems/3.0.0
jekyll # Test if the changes are correct
# If the command can be found, add this line to ~/.bashrc so it remains effective in new command lines
echo 'export $PATH=$PATH:[the gem path above]' >> ~/.bashrc # Single quotes are necessary; double quotes will replace the variable with its value
At this point, the Jekyll environment should be configured. The next step is to build and push.
Build and Push#
First, clone the project from Github to your local machine, create a new project or fork the theme; the project name must be in the format of Github username.github.io, as mentioned earlier. If creating a new project, adding an empty README will facilitate later cloning. Once completed, clone the project to your local machine.
git clone https://github.com/[username]/[username].github.io
cd [username].github.io # Enter the project directory
If it is a new project, place all theme files into the project. There should be _config.yml, index.html, _post, and other files and folders.
Now you can build locally.
jekyll build # The build result will be in the _site folder
# Or
jekyl b # b is shorthand; the effect is the same
Additionally, you can start a local service to showcase the blog; every time you save a Markdown file, the website will automatically rebuild, and refreshing the page will show the modifications.
jekyll serve # Then visit the Server address: that URL to see it
# Or
jekyll s # Shorthand
After a successful build, create a separate branch for the built webpage files. The script below contains deletion commands, so be sure to check which branch you are on; otherwise, you might accidentally delete Markdown files.
git branch # Check what the current branch is called; you'll need to return to it later
git branch gh-page # Create the gh-page branch
git switch gh-page # Switch to the new branch
git rm -r * # Checkout will bring all files from the original branch, delete them
git commit -m "clean up"
git push --set-upstream origin gh-page # Push to Github
git checkout main # Return to the previous branch
The branch has been created; now build and push to Github.
# Build on the main branch
git switch main
jekyll build # Convert md to html

# Place the generated HTML website from _site into the root directory of the gh-page branch
git switch gh-page
mv _site .site
rm -rf *
mv .site/* .
rm -rf .site
ls # There should be files like 404.html, main.html

# Push to the gh-page branch
git add *
git commit -m "Update Blog"
git push

# Return to the main branch and push
git switch main
rm -rf _site
git add *
git commit -m "Update Jekyll Blog"
git push
At this point, the complex part is basically complete; finally, as before, change the Pages Source. Go to Github project's Settings -> Pages and set the Source to gh-page, /root, and save.

After a few minutes, the website should be accessible.
Blog Comments#
You may want feedback from readers after they finish reading your blog. Article comments are not a static feature, so they cannot be implemented solely with Github Pages. The solutions I know mainly fall into two categories:
- Use a self-built or third-party comment service.
- Use a solution based on Github Issues or Discussions.
Initially, I used a third-party comment service hyvor, which was free during its trial operation but is now charged. Such services usually have large packages; for example, hyvor's starting package at $5/month allows for 100,000 page views. I estimate that my blog will never reach such traffic in my lifetime. 😂
Github's services are still more generous. 😂 There are many projects of this kind, and some themes may have built-in support for some of them; for example, Chirpy has built-in support for disqus, utterances (based on Issues), and giscus (based on Discussions). The main drawback of these solutions is that it seems all projects require users to log in with their Github accounts to comment, and some may also require user OAuth authorization.
Currently, I am using utteranc, and I will use it as an example; others are quite similar.
Utteranc creates an Issue for each article, and user comments on the article will be saved as replies under that Issue. Commenting requires users to log in with their Github accounts and then authorize utteranc.
The installation process is very simple:
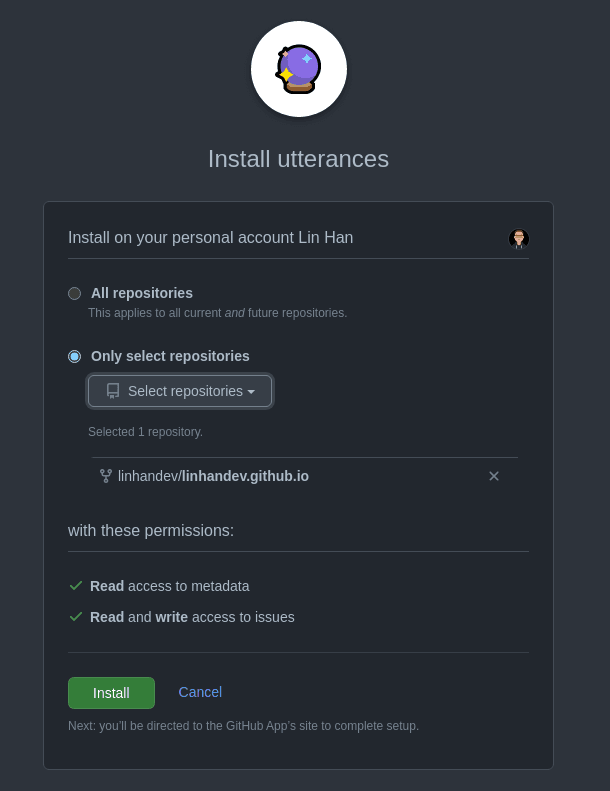
- Visit this URL to install the utterances app on Github.

You can grant permission to just one project for the blog.
- After installation, the utteranc website will open; follow the prompts to set it up, starting with the project name.

- Choose the format for each article's Issue.
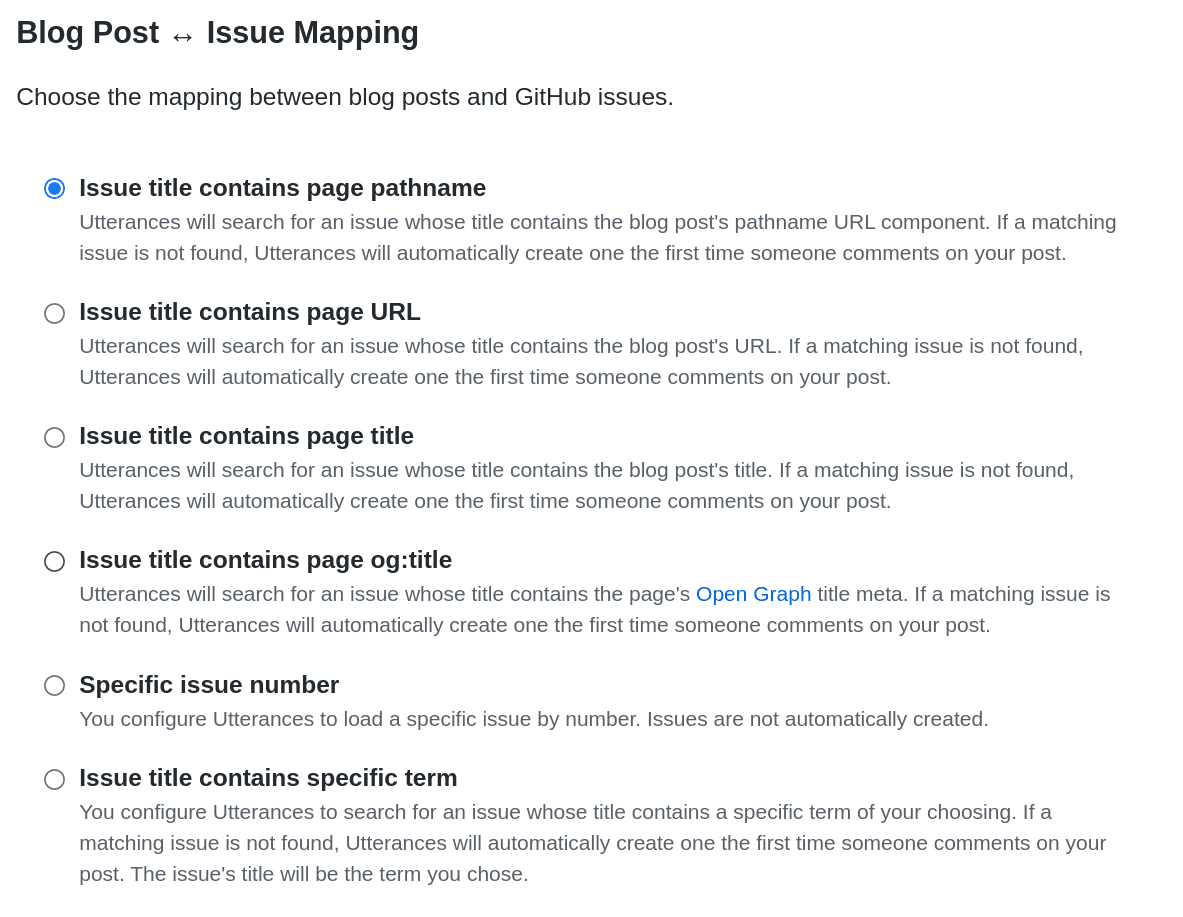
Here, it is important to note that utteranc will look for the corresponding Issue based on the configured format, generally based on the article's title or Markdown file name. If you change the article's title or md file name, you also need to modify the corresponding Issue name; otherwise, it will not find any comments. Personally, I feel that setting the first option is the best, as the file name is likely to change less than the article name.
- You can then fill in a label for the Issue created by utteranc, which is not very significant.

- Finally, choose a color scheme that coordinates with the theme visually.

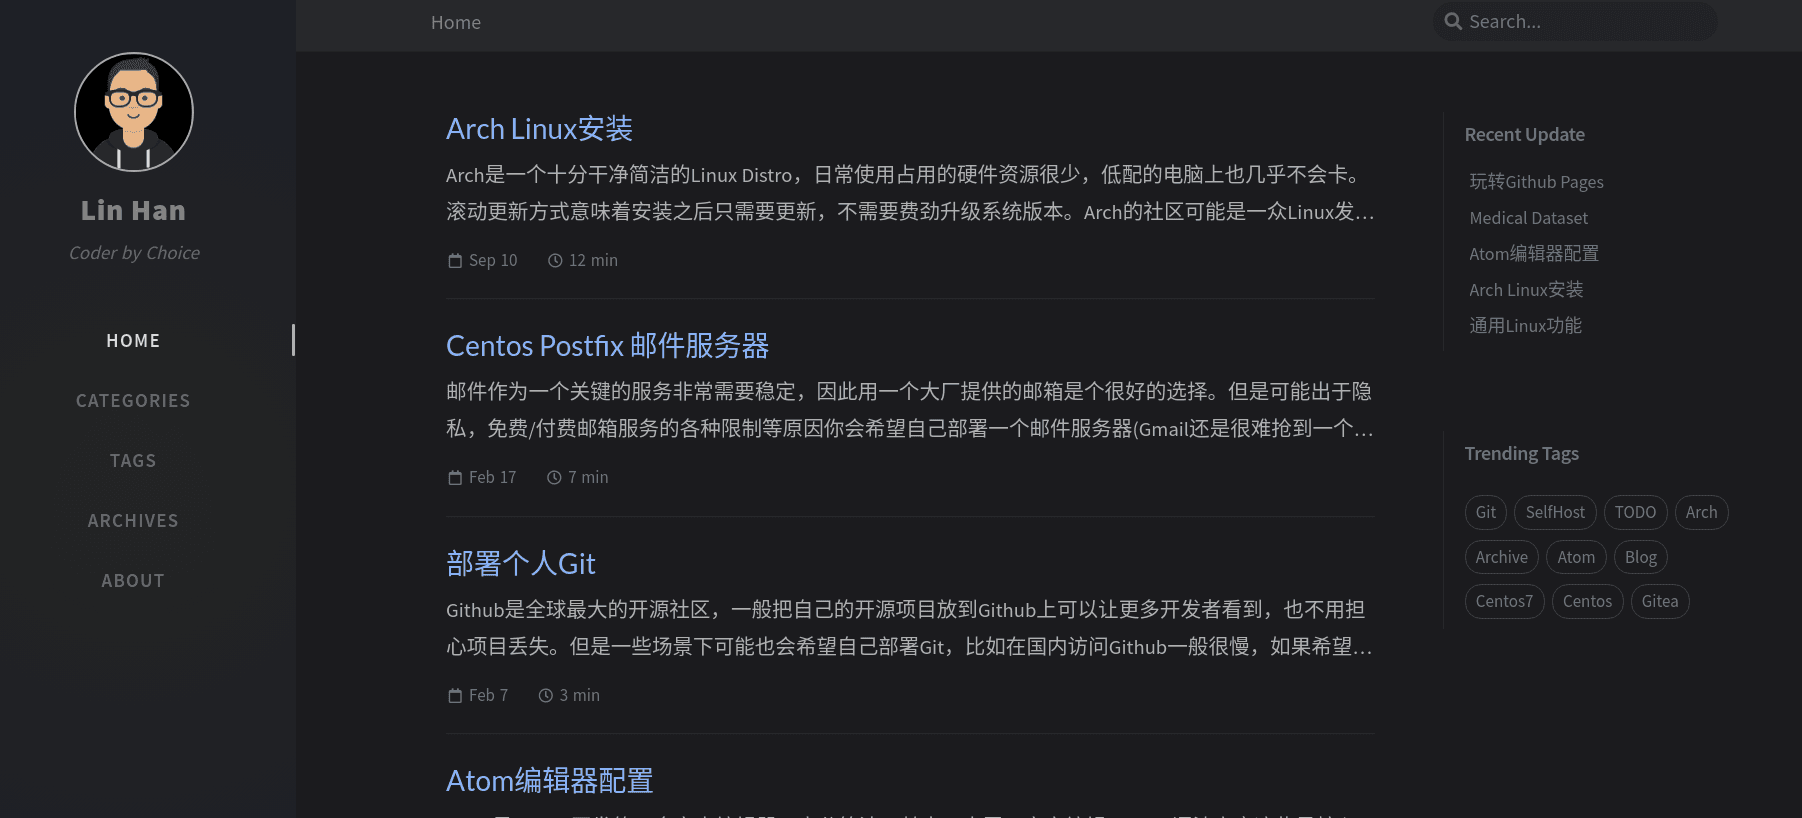
Below, you will see a piece of code; insert it into the article template just below the main content to use it. Chirpy's article template is in _layouts/post.html, and other themes are similar. The final effect will be:

Local Editing Environment#
Markdown is not WYSIWYG, and inserting images can be a bit cumbersome. A local environment can effectively solve these problems and simplify the writing process. I personally like Atom a lot; I recorded how to configure Atom for writing Markdown in another article, which you can refer to.
Search Engine Indexing#
Generally, personal blogs do not have much traffic; the author of the Chirpy theme even does not recommend enabling article view count features, fearing it might dampen bloggers' creative enthusiasm 😂. However, if your blog has some high-quality content, search engines can bring in some traffic.
Search engine optimization is a science, but if you just want to casually inform search engines, "I have a website; whether you crawl it is up to you," then you only need to add a robots.txt file and submit a sitemap.
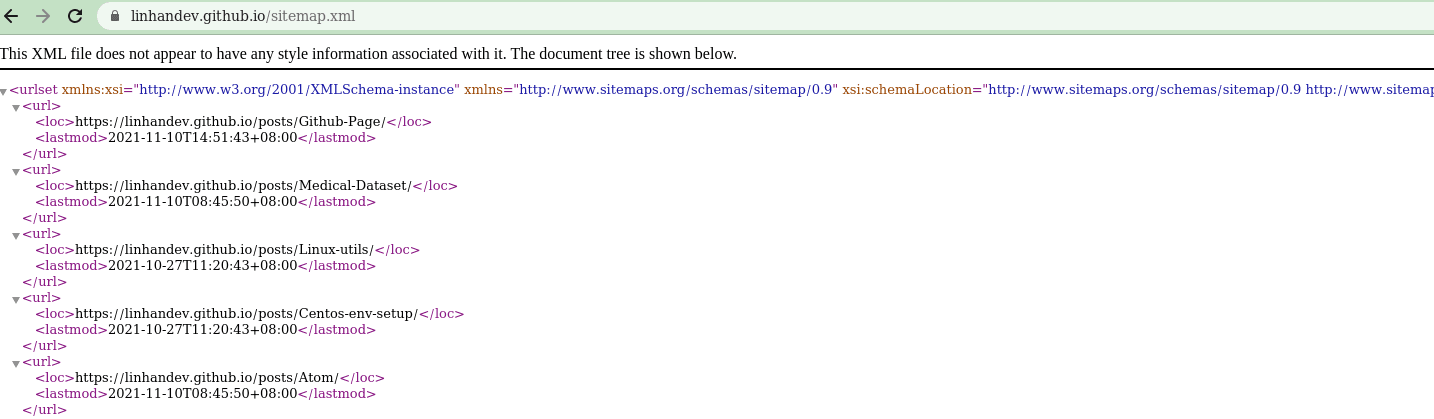
A sitemap can be seen as a map of the website, informing crawlers what pages are accessible on this site. Most themes come with this feature; visit [github id].github.io/sitemap.xml, and if it does not return a 404, then there is a sitemap. For example, mine looks like this:
If your theme does not include a sitemap, you can add one yourself.
The robots.txt file is used to inform search engines which pages on the website should be crawled and which should not. You can visit [github id].github.io/robots.txt to check if you have this file. If not, just add a robots.txt file in the project root directory; a very simple version would be:
User-agent: *

Disallow: /norobots/

Sitemap: https://[github id].github.io/sitemap.xml
{: file='robots.txt'}
This file tells search engines that all types of crawlers can crawl this website, except for all pages under the /norobots/ path, and indicates where the sitemap is located.
With both robots.txt and sitemap in place, you can submit your website to search engines. This requires using webmaster tools from major search engines, such as webmaster or search console. Here are some commonly used search engine webmaster tool links:
The submission process is similar:
- Register an account.
- Prove that the website is yours.
- Submit the sitemap.
Proving ownership usually has multiple methods; for Pages, the most convenient should be adding a file. You only need to download the file and place it in the project root directory, then push the modifications to Github. Note that this file should be placed in the directory with the Markdown before building, not in the directory of the built webpage; otherwise, rebuilding will erase this file.
Another common method is to add a meta tag in the website header. The advantage of this method is that it keeps the project root directory tidy when adding multiple search engines (if this can be considered an advantage). The tag content is a random string. For example, my Bing search verification tag is:
<meta name="msvalidate.01" content="D657F7EB150CC9886DA47F92C4D34ED6" />
In the Chirpy theme, the website header part is defined in _includes/head.html; if your theme directory structure is different, you can search for files starting with head in the project. Once found, place this line of code in the head section of head.html.
After verifying ownership, find the tab with the sitemap, click in, and enter the sitemap URL to complete the process. Based on the limited traffic from adding multiple search engines to my website, it seems that Bing's domestic version is the most friendly to new websites; I could see traffic from cn.bing.com about 3-4 days after submitting the sitemap. Google also had a couple of visits, while most other domestic search engines didn't even bother to crawl.
Traffic Statistics#
Thinking from another perspective, I do not want to be tracked by others, so I do not implement traffic statistics.
Custom Domain Name#
The default URL for Pages is fixed; for example, personal blogs are usually username.github.io, and project websites are username.github.io/project-name. However, Pages also supports custom domain names.
To use a custom domain name, you obviously need to own a domain name, which can be purchased from major cloud service providers. The general process is:
- Register an account on cloud services like Baidu, Alibaba, or Tencent.
- Complete real-name verification.
- Find the domain name product.
- Choose one and place an order.
That's it. Prices vary based on many factors, such as domain length, top-level domain, and duration of purchase, generally costing several dozen per year. If you do not want to spend money, you can apply for a free domain at Freenom.
In the domain resolution backend, set this domain to CNAME pointing to username.github.io, then fill in your domain name in the project’s Settings -> Pages. At this point, the gh-page branch will have an additional CNAME file; make sure to pull it locally to avoid conflicts. Also, add this file to the root directory of the main branch. After that, you can access your site using your own domain name.
I encountered a bit of trouble when converting from a custom domain back to the free domain provided by Github; entering the free domain always redirected directly to the previously resolved custom domain, resulting in a Github 404 page. In this case, clearing the browser cache solved the problem.
Conclusion#
This concludes the basic usage of Github Pages. This article will continue to be updated for corrections and enrichment. If you encounter any issues during use, feel free to leave a comment below.